QR photo uploads: from a phone to the print queue

Guests scan a QR code or open a link, choose photos in their browser and send them to the organizer. The organizer reviews each photo, approves it and selects Queue for printing. Complete approved sets then fill your layout and enter the PrintStation queue.

Guests need no PhotoBaker account, app installation or social media post. Uploading does not start printing.

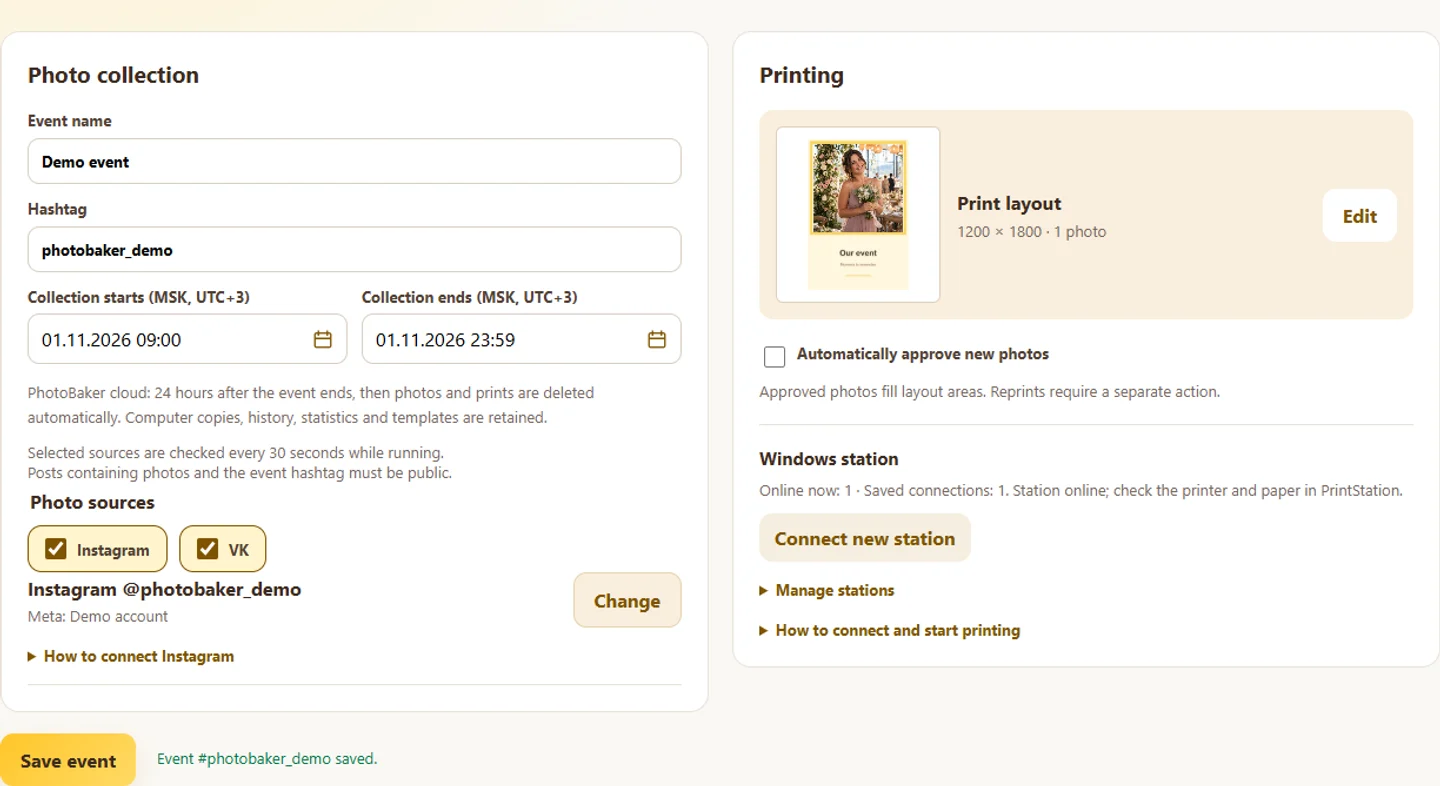
Guest upload settings

Guest upload settings

The working dashboard with demo data. The QR code in this screenshot is a demonstration.

From a QR code to a paper print

  1. Open photo collection

    Create an event, set its collection period, enable guest uploads and save your layout. Get the link and QR code in your dashboard and share them with guests.

  2. Review uploaded photos

    Guests open a page with the event name and submit photos. Every upload starts as pending. The organizer manually approves suitable photos in the dashboard gallery, then selects Queue for printing for every photo in the set.

  3. Prepare physical printing

    Once all photos in a set are approved and selected for printing, they fill the layout and enter the PrintStation queue. An operator selects the printer and paper, checks a test print and prints manually or separately enables automatic printing.

One guest, one complete set of photos

Layouts with 1–4 photos

For a layout with 2–4 frames, the guest selects exactly that many photos in one set. A three-photo set fits a three-frame layout. Photos from different guests are never mixed. Every photo in the set must be approved and added using Queue for printing.

Cropping and transparent frames

Crop to fill fills the frame by cropping photo edges. Fit entire photo preserves the whole image but may leave empty space. For Below frame placement, use PNG with transparent openings: opaque areas will hide the photo.

Manual review in the dashboard

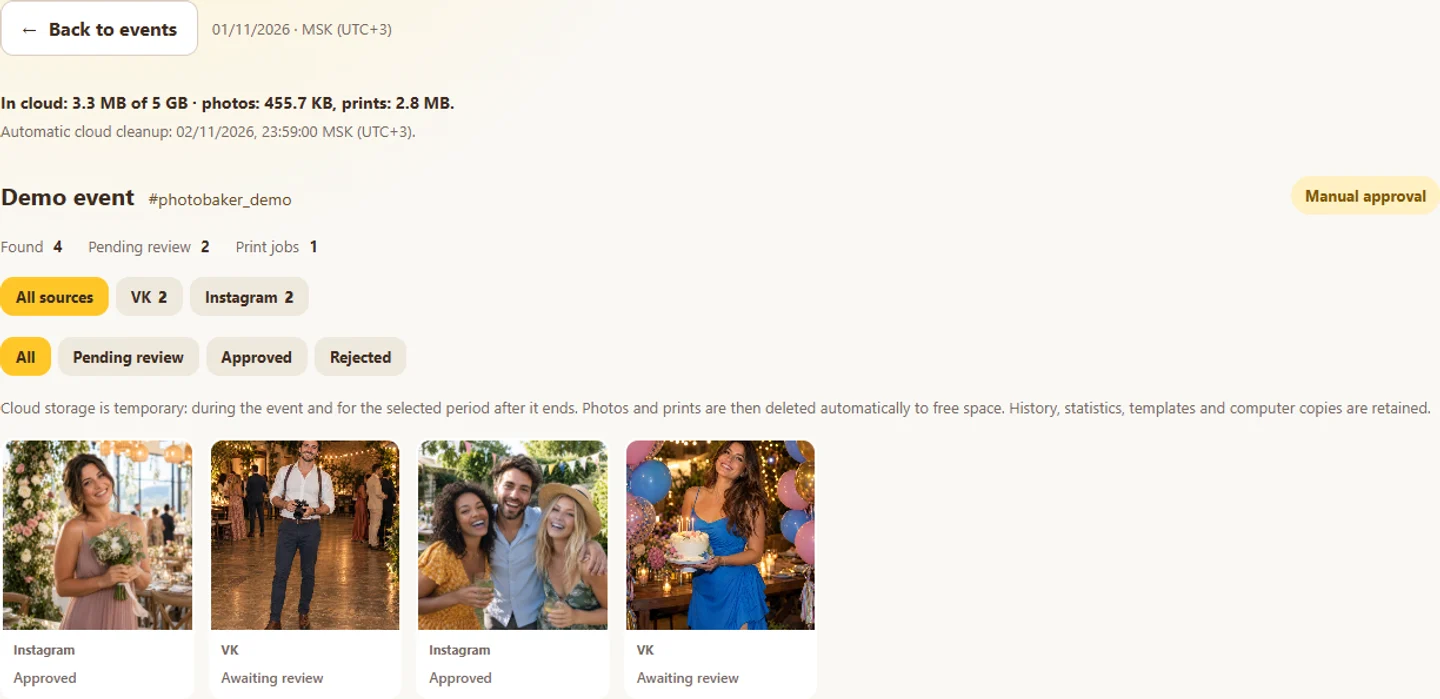
Manual review in the dashboard

Working interface with demonstration photos.
Example output with your layout

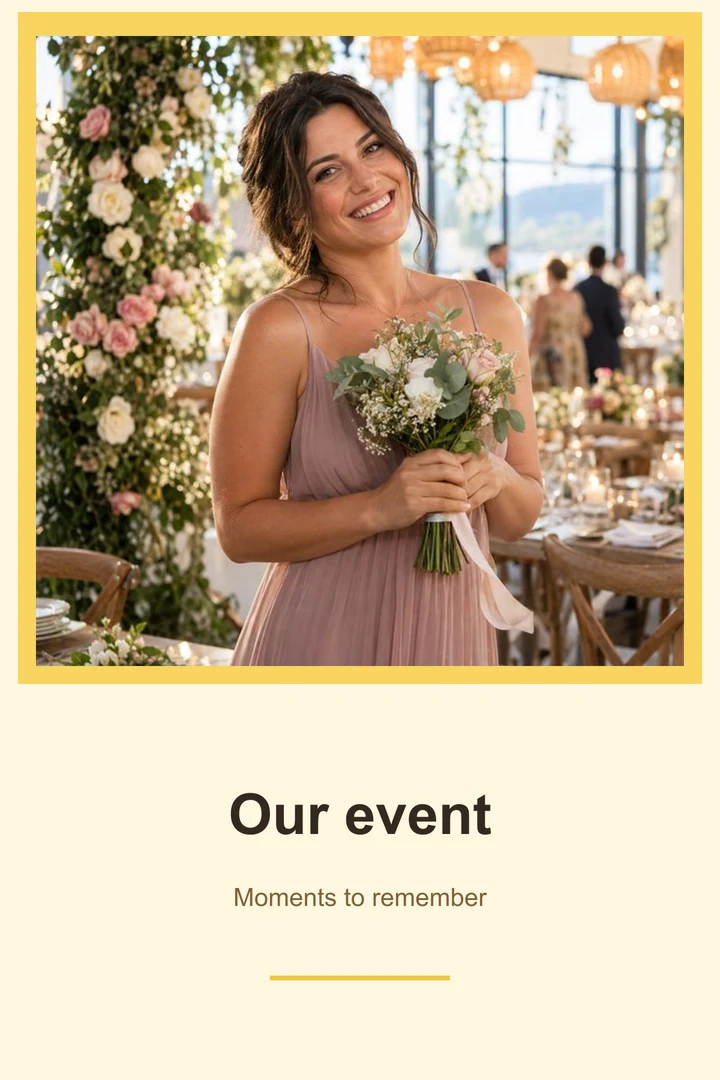
Example output with your layout

Example rendered image. Check physical output separately on your printer.

Practical questions

Check the whole workflow with a test photo before guests arrive.

Can QR uploads skip moderation?

No. Every guest photo first waits for manual review. Automatic approval for other sources does not bypass this rule. Only approved photos can enter the queue.

Are iPhone photos supported?

Yes. HEIC/HEIF, JPEG, PNG and WebP are accepted, up to 10 MB per file. Internet access is required to upload.

Why does the page say collection is closed?

Check that the event is active, within its collection period and has guest uploads enabled. If the link was replaced or disabled, share the current link from the dashboard.

What if a collage set is incomplete?

An N-frame layout requires a complete set of N photos from one guest. An incomplete set cannot form a finished print. If the layout changes, refresh the upload page and select the photos again.

Where do I get the QR code? Can I share a link?

Both are available in the event dashboard. The QR code opens the same upload page as the link. Display it near the photo station or send the link to guests.

Why has an approved photo not printed yet?

Approval allows a photo into the queue; it does not confirm physical printing. Check that the full set is approved and added using Queue for printing, PrintStation is connected, the printer and paper are ready and automatic printing is enabled if needed.

How much does it cost?

Free with a watermark. Monthly access without it: RUB 1,990 per month. Renew manually or opt in to monthly automatic renewal when paying. Disable renewal in the dashboard. Equipment and consumables are supplied separately.

Prepare your first test print

Create an account, set up your layout and check the result on your printer.

Try for free